Shoe soles have journeyed with us since 8000 BC, from moccasin leather to today’s durable designs.1 They’ve always had one job: to protect your feet through thick and thin. Now, it’s time to return the favor.
With just a few tools and a sprinkle of elbow grease, we’ll guide you through how to clean shoe soles easily and quickly.
Gathering Your Cleaning Supplies
Before we get into how to clean shoe bottoms, we must first collect all the supplies you’ll need. Beyond appearance, cleaning the sole sustains your shoes’ life. 300 million shoes are thrown away yearly, and we don’t need to add to the pile.2 So, time for the roll call! Let’s line up the cleaning gear needed to make your soles sparkle for years.
- Soft-bristle brush – The soft bristles on this type of shoe brush are tough on dirt yet gentle enough to preserve your sole. They also prevent scratches on softer materials like rubber or suede. If you want to preserve the life of your suede, leather, or canvas shoes, consider getting a soft bristle brush to clean the soles.
- Mild soap – Before you reach for the fairy liquid, stop! Dish soaps have harsh chemicals; a pH-balanced soap or mild detergent ensures effective cleaning without discoloring or damaging your soles.
- Microfiber cloth – With its fine fibers, this soft cloth is elite at trapping dirt and absorbing moisture. It helps leave your soles dry and dirt-free without any pesky residue.
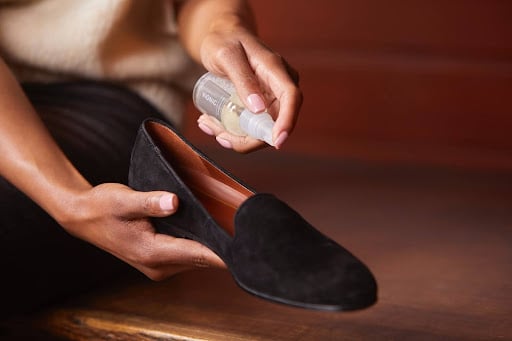
- A specialized shoe care kit – Our suite of sole-care essentials keeps your footwear in tip-top shape without the guesswork.
With the right tools in hand, you’re all prepped. Now, we can lay the groundwork for pristine soles by taking care of the surface debris.
Prep Work: Removing Surface Debris
You know how chefs set the table before serving up delicious meals? Like cleaning shoe soles, it all starts with prep work. Before we can get to work, we’ll need to free the sole of heavy debris.
Here’s how:
- Shake ‘em off – Before anything else, knock your shoes together outside or over a bin to tap off any loose dirt, debris, or leaves you may have stepped in.
- Brush ‘em down – Call up your soft-bristle shoe brush and gently sweep off the day’s accumulation from your soles. This will be your first pass for their makeover.
- Wipe ‘em down – Lastly, for the lingering fine dust, run a barely damp microfiber cloth over the soles. The magic rag will pick up those last bits of dirt, prepping the surface for a deeper clean.
With that formality out of the way, it’s time to choose your cleaning strategy.
Choosing the Right Cleaning Method
Before we get into how to clean soles of shoes, we need to pick the approach. Here’s a quick tour of the available armory:
- Soap and water – The classic. Great for most materials, soap and water are gentle yet effective. However, it may not be the best for leather, which can be damaged by excess water.3 Specialized cleaners – These are for those special kinds of shoes, like suede or mesh. They cost a bit more, but they get the job done right. Just try it out on a small spot first to make sure it doesn’t mess with the color or texture.
- Baking soda and vinegar – Got white rubber soles that need brightening? This mix is perfect for white sneakers or white dress shoes. But if your shoes have any color, take it easy. The acidity could fade them over time.
- Rubbing alcohol or disinfectant wipes – These are great for a quick cleanup and to zap germs. They’re super for synthetic materials, but don’t go overboard on leather; it can dry them out.
With your perfect match of cleaner and shoe type, you’re all set. Next, we’ll roll our sleeves and dig into the step-by-step cleaning process.
Step-by-Step Cleaning Process
Alright, down to business. Here’s the straightforward path to making those soles look brand new again:
- Prep your space – Get your area ready and all your tools out. If your laces are in the splash zone, pull them out to stay dry and clean.
- The initial sweep – With your soft-bristle brush, gently dust off the loose dirt. That’ll make these next steps much more fluid.
- Suds up – Mix a little warm water with a drop of mild soap. You want it just sudsy enough to work its magic without creating a bubble bath (you can still run a celebratory one after).
- Scrub-a-dub – Take that brush, dip it in your mix, and start working in circles on the soles. Pay extra attention to those nooks and crannies where grime likes to party.
- Wipe off – Grab your soft cloth and wipe down the soles. This is your chance to catch any stubborn spots you might’ve missed.
- Spot treat – Got a trouble spot? A smaller brush or an old toothbrush can get right in there for that detailed touch-up.
And just like that, your shoes are looking stellar. Now you can stride out and… wait, what’s that? A stain you weren’t able to scrub out? Keep reading!
Dealing with Stubborn Stains
Got a tough and clingy stain on your sole? No stress. Here’s the lowdown on getting it out:
Dab some stain remover that’s safe for your shoe type right on that pesky spot. Grab an old toothbrush or any small brush you’ve got and gently work the area in circles. You’re not trying to scrub it into oblivion—just light circles until you see the stain clearing up. When it starts to fade, take a damp cloth and wipe off any extra cleaner.
Remember, go easy and take your time. If that spot is stubborn, give it another go after the sole dries. Patience is your pal here. With those tough stains finally out of the picture, let’s move on to the rinse and dry.
Rinsing and Drying Shoe Soles
You’ve scrubbed and scrubbed, and now your shoe soles are on the brink of looking as good as new. But we’re not done yet; it’s rinse and dry time. Let’s power through these last few steps and stick a bow on your brand-new footwear.
- Rinsing – After the scrub down, it’s time for a quick flick of the wrist with a lightly damped microfiber cloth over the soles. This will clear off the cleaning solution to maintain the material’s integrity. But don’t soak the soles even clean water, a light touch is all you need.
- Drying – Give the soles a friendly pat down with a towel to wick away moisture. Then, let them air dry in a cool, breezy spot, away from direct heat or sunlight. They might need a full day, but it’s worth the wait.
Now that your soles are squeaky clean and drying out, we’ll help you keep them that way (and we don’t mean leaving them in the closet). Up next, we’ve got some solid gold tips for preventative care.
Preventative Maintenance Tips
Consistent care for your daily troopers, especially those trusty wear-to-work shoes, means they’ll always be meeting-ready. Here’s how to keep your soles shining and cut down on clean-up time:
- Daily dust-off – Swipe a brush over your soles after each outing to stop dirt in its tracks.
- Smart storage – When it comes down to how to store shoes , make sure to keep your kicks in a cool spot, away from sunbeams, and off each other to stay clean.
- Shoe vacay – Switching your shoes out lets them rest and de-grime.
- Shield spray – Spritz on some protector to fend off the filth before it sticks.
- Quick fix – Spotted a spill? Fast action can save you from a scrubbing session later.
For that extra layer of care, slip in some orthotic insoles to keep your steps comfortable, and your shoes’ interior equally looked after.4 Keep these tricks in your back pocket, and your soles will stay slick with much less scrubbing. But not all soles are created equal, and neither is the dirt they meet. So, what’s the best care for different shoe types?
Cleaning Soles for Different Shoe Types
Different kicks, different tricks. Here’s how to keep your shoes clean based on their style:
- Leather – Be kind with a damp cloth and leather cleaner. Condition them after to keep ’em soft and supple.
- Rubber – They’re tough and typical of stylish Oxford shoes. Go at them with soap and a stiff brush. Take on scuffs with a magic eraser.
- Synthetic – Often found on athletic walking sneakers, these need a soft touch with mild detergent. Be sure to steer clear of harsh cleaners.
- Suede – High maintenance but worth it. Use a suede eraser for spots and brush softly. Suede and water aren’t a good mix.
When it comes to the darlings of versatility— flats and loafers —a gentle cleaning routine will keep them clean on the daily grind.
In any case, if you cater to each sole’s character, they should stay lively for the long haul.
Next Steps in Shoe Care: Beyond Clean Soles
You’ve mastered how to clean the soles of shoes, and now they look top-notch. Congratulations, that’s no small feet—sorry, feat. (We hope you’ve started that celebratory bubble bath.) At Vionic, we know the journey to tip-top shoe care doesn’t end here. For kicks that feel as good as they look, your next read awaits with our guide, “ Sweat-Free Steps: Preventing and Managing Sweaty Feet in Shoes .” It’s packed with breezy tips to keep your feet dry and your shoes fresh.
And to help care for all of your shoes, new and old, keep a Vionic Shoe Care Kit on hand. From leather, to suede, to even the shoe footbeds, this kit has everything you need to scrub up those soles with confidence.
Sources:
- “Shoe.” Britannica. https://www.britannica.com/topic/shoe
- Lickteig, Jane. “Engineering students’ projects keep shoes out of landfills” Wichita State University. 10 March, 2021. https://www.wichita.edu/about/wsunews/news/2021/03-march/EET_Shoe_Recycling_5.php
- “The Degradation and Conservation of Leather.” Journal of Conservation and Museum Studies. https://jcms-journal.com/articles/10.5334/jcms.3972
- Cornwall, Mark et al. “Footwear and Foot Orthotic Effectiveness Research: A New Approach.” Journal of Orthopaedic & Sports Physical Therapy. 1 June, 1995. https://www.jospt.org/doi/10.2519/jospt.1995.21.6.337
Leave a Reply